Today is one of those days where Parker just seems to be into everything. He is freaky fast, and has seemed to find the one or two things I haven’t baby proofed even though the house is filled with all sorts of toys just for him. I’m convinced I could have just bought water bottles, rolls of toilet paper, and trashcans and he would have been perfectly happy with those!
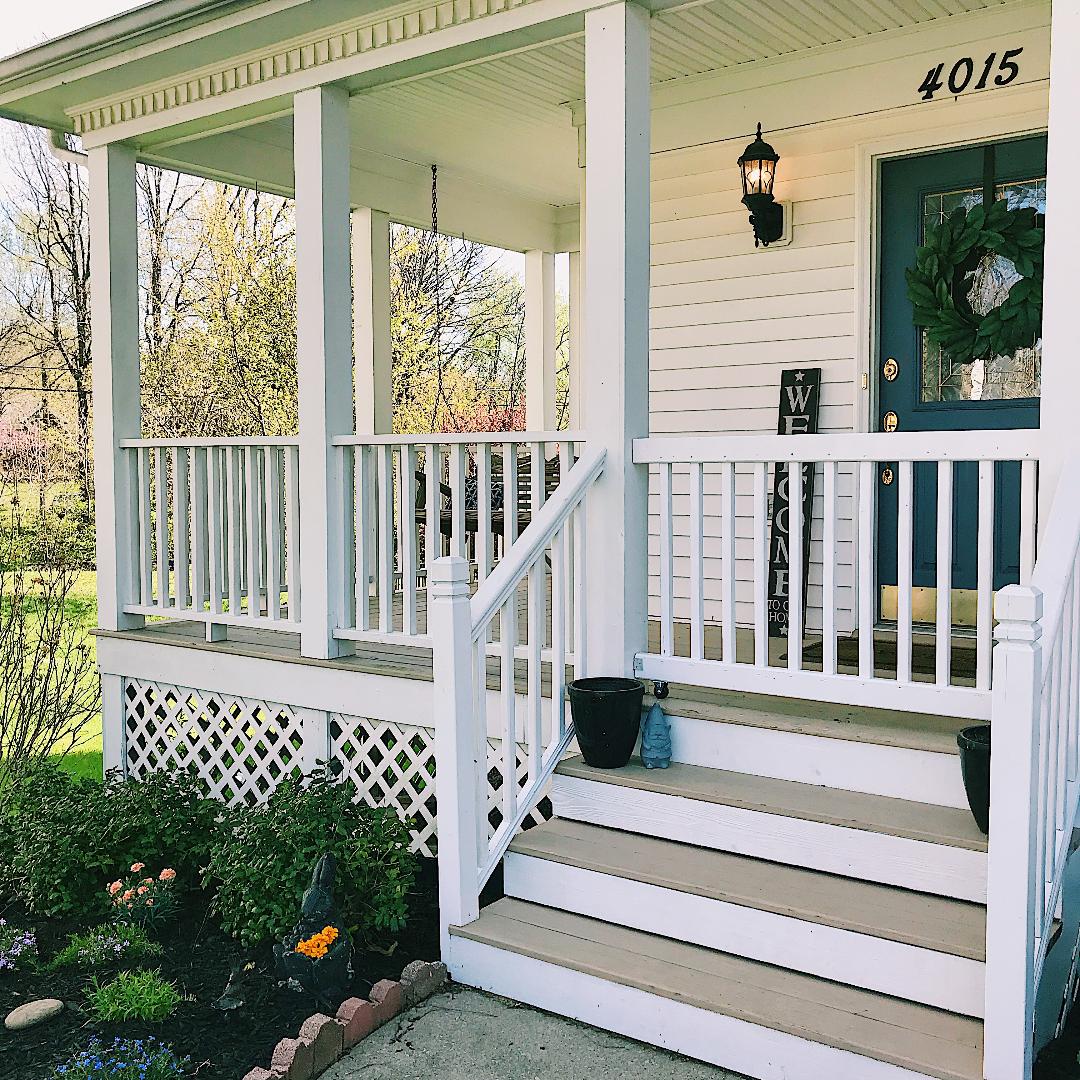
I decided that I wanted to be able to use our front and back deck space with Parker without having to chase after him all the time as the weather is starting to improve here in Kentucky. I had made the gates inside of our house fairly easily as you can see a few posts back here, but I wanted something that blended in a little better with out railing so it didn’t look so out of place. Again, Parker is our first, so I know I’m going to be looking at this for a while!
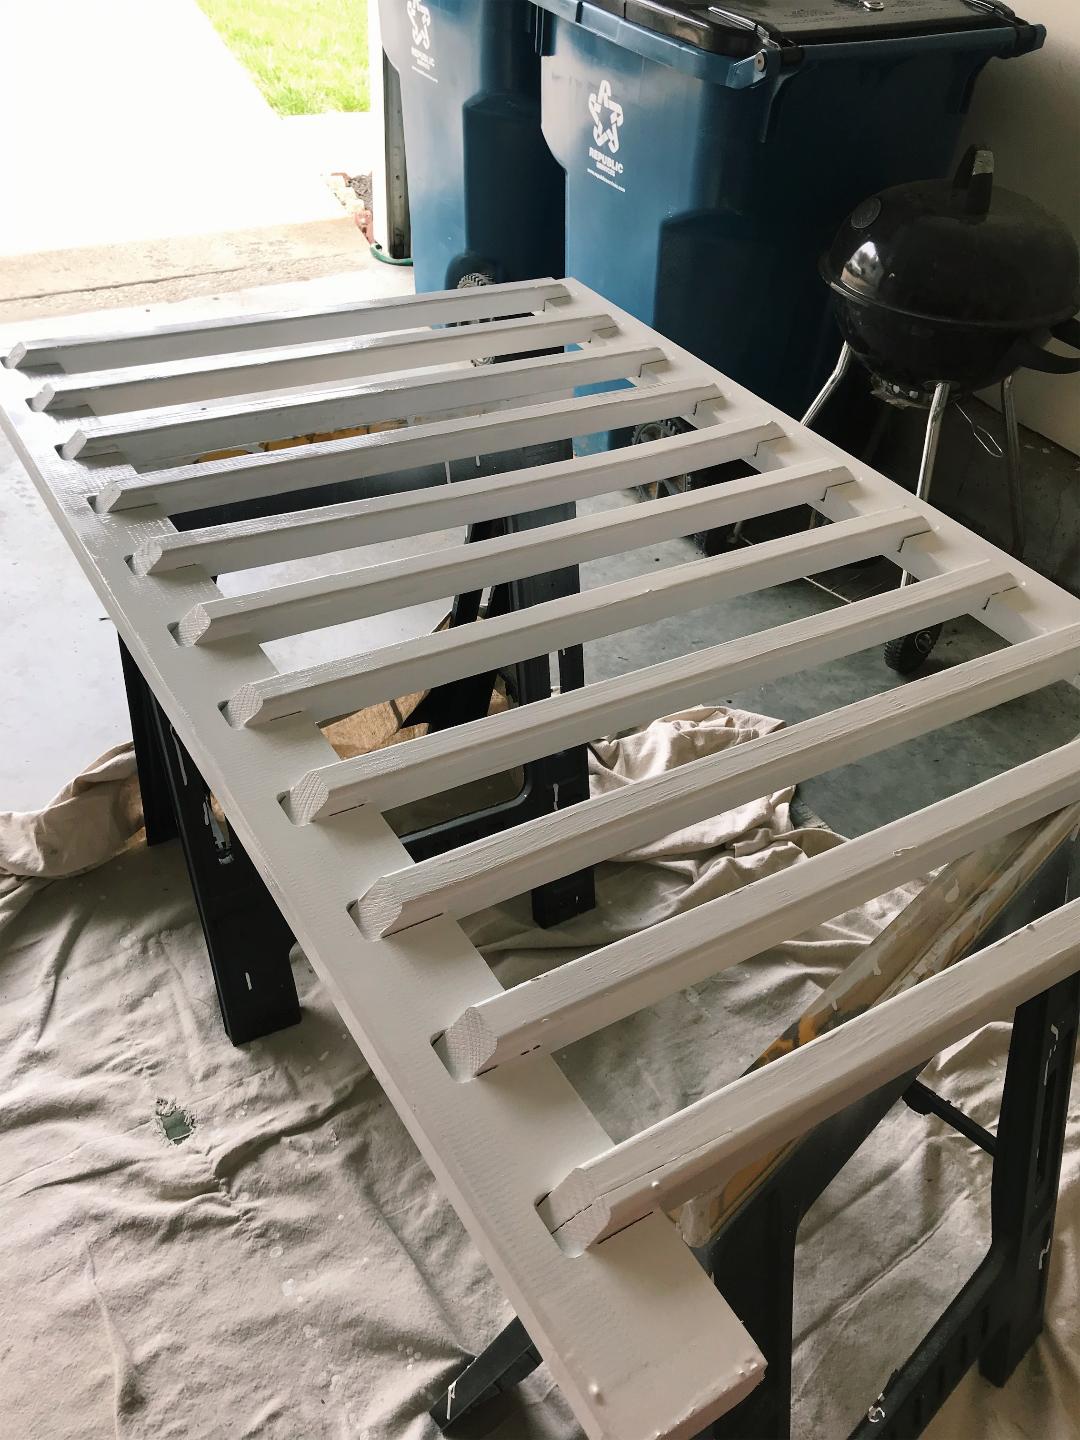
When I went to Lowes, I happened upon deck railing that almost matched ours exactly. It came in a pre-assembled row of 72” which was more than I needed for both spaces, and was only $37 for each!

Once I had measured my openings for the front and back deck, I used my circular saw to cut the railings down to size. I was able to use the hinge gate mounts I had done on the inside gates previously, on the back deck, but our front porch has a wider stairwell, and I just wasn’t sure if one of those mounts could support the weight of a gate that long, so I had to come up with something else.

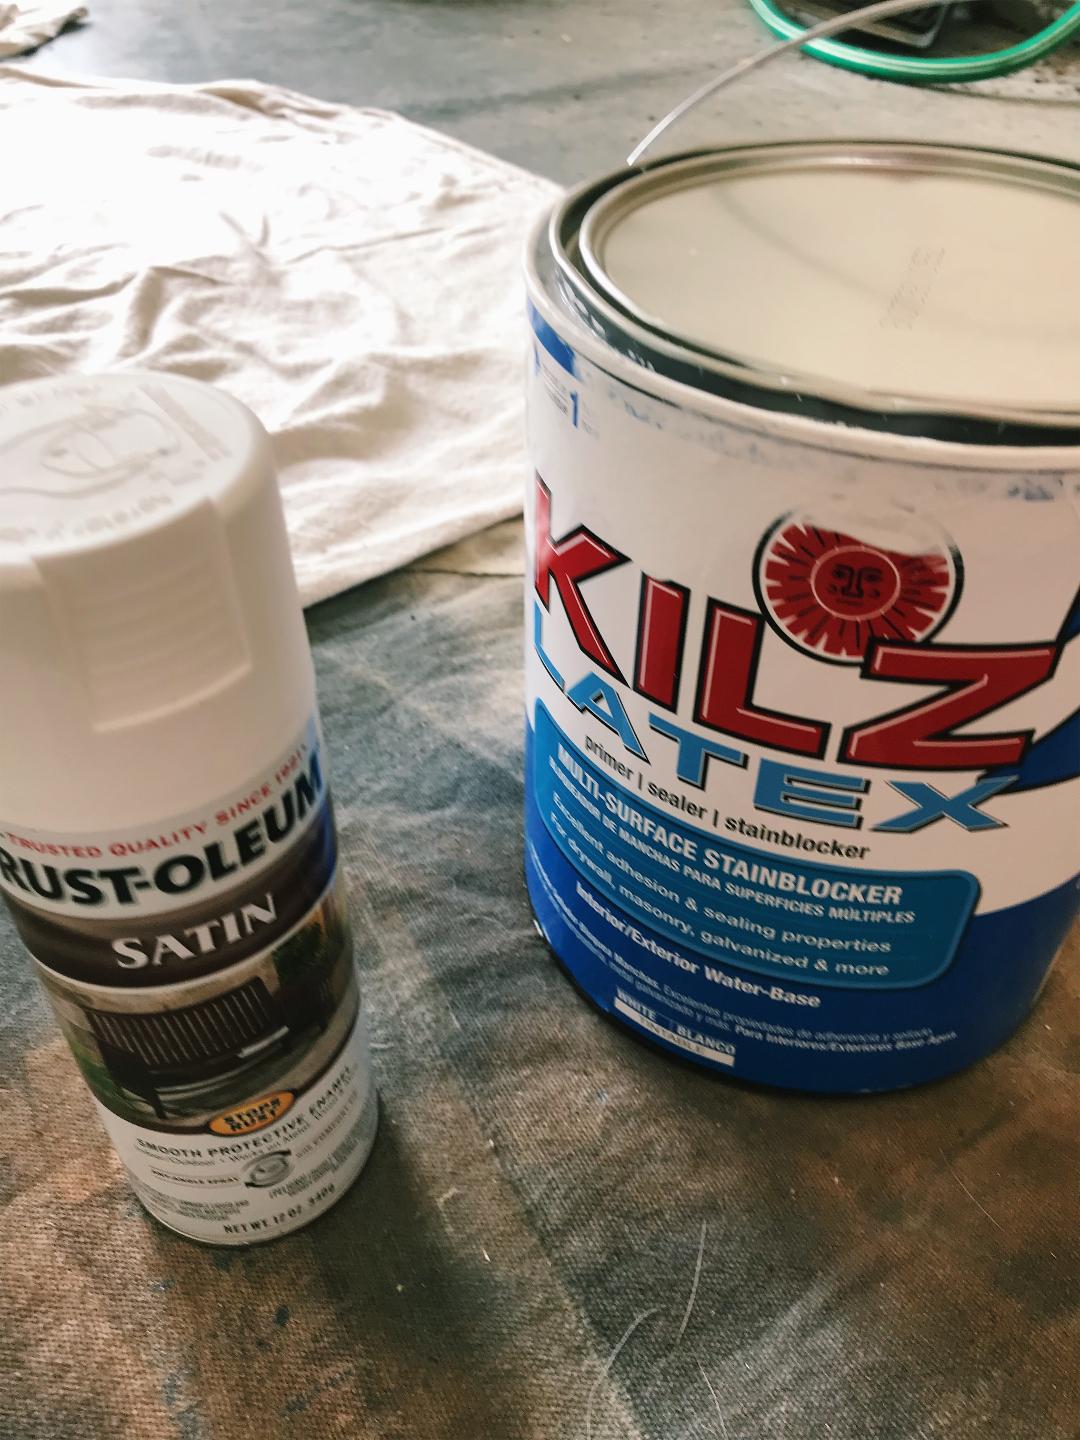
I wasn’t sure what sort of paint to go about using since these would be outside, so I primed them with two coats of Kilz paint primer and then one coat of Rust-oleum spray paint that is meant for outdoors. Hoping that holds up for us well!
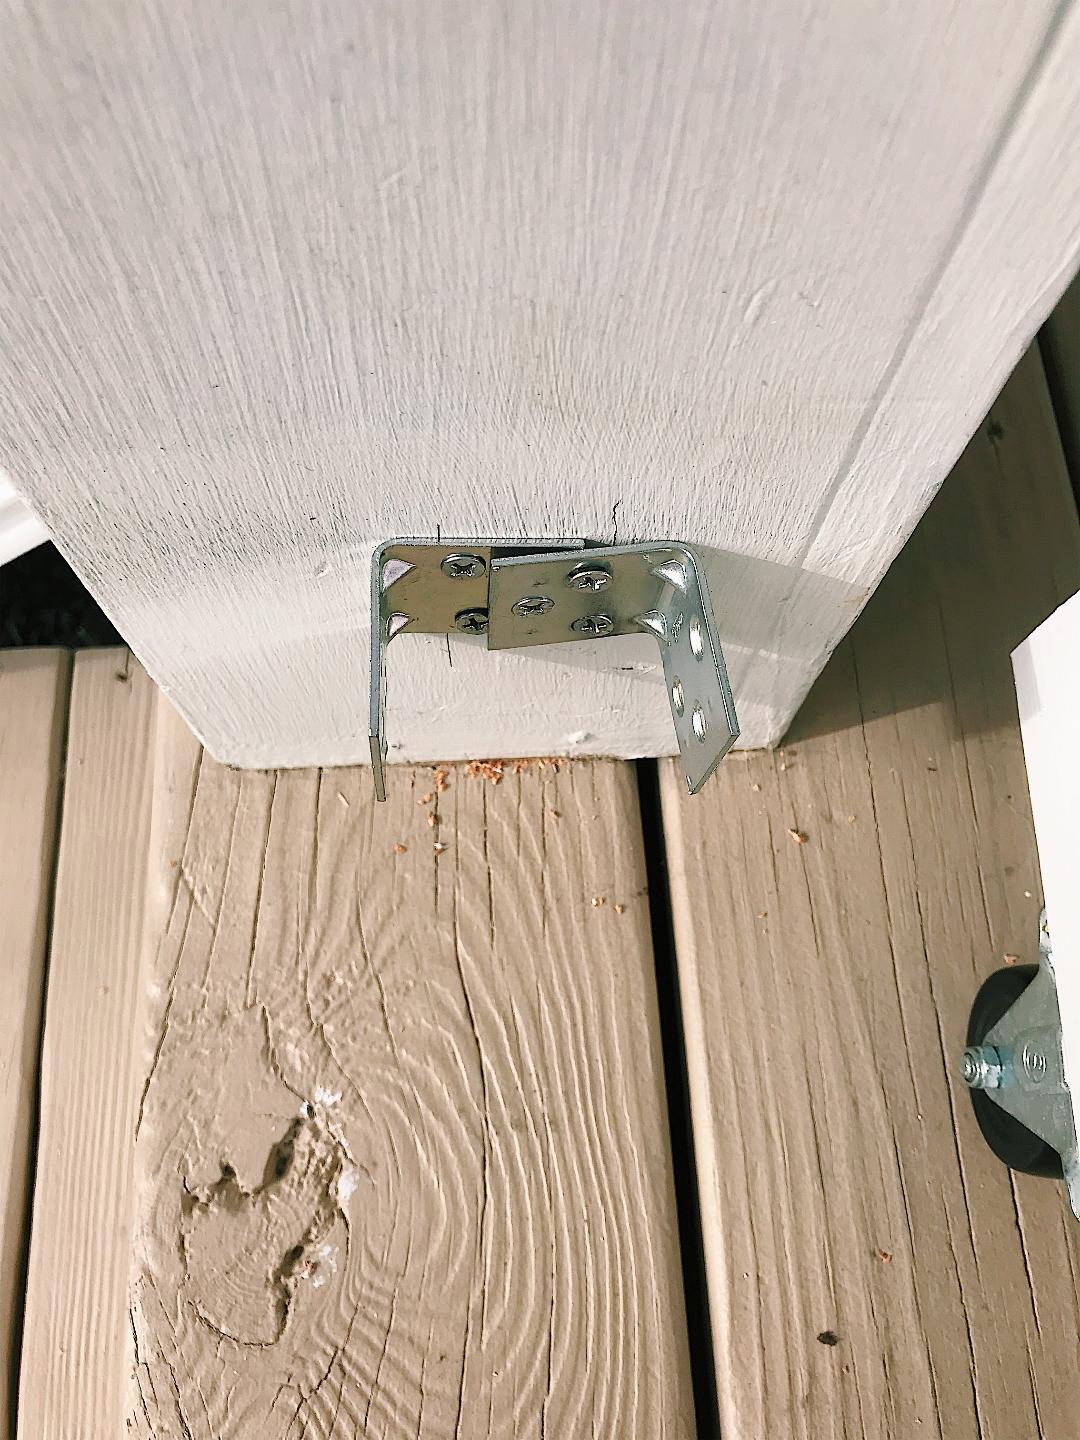
I wanted it to be relatively easy to move, even though I wasn’t putting it on a hinge so I decided on a non-rotating wheel to make it easier to move to put up or move to open when guests come over.

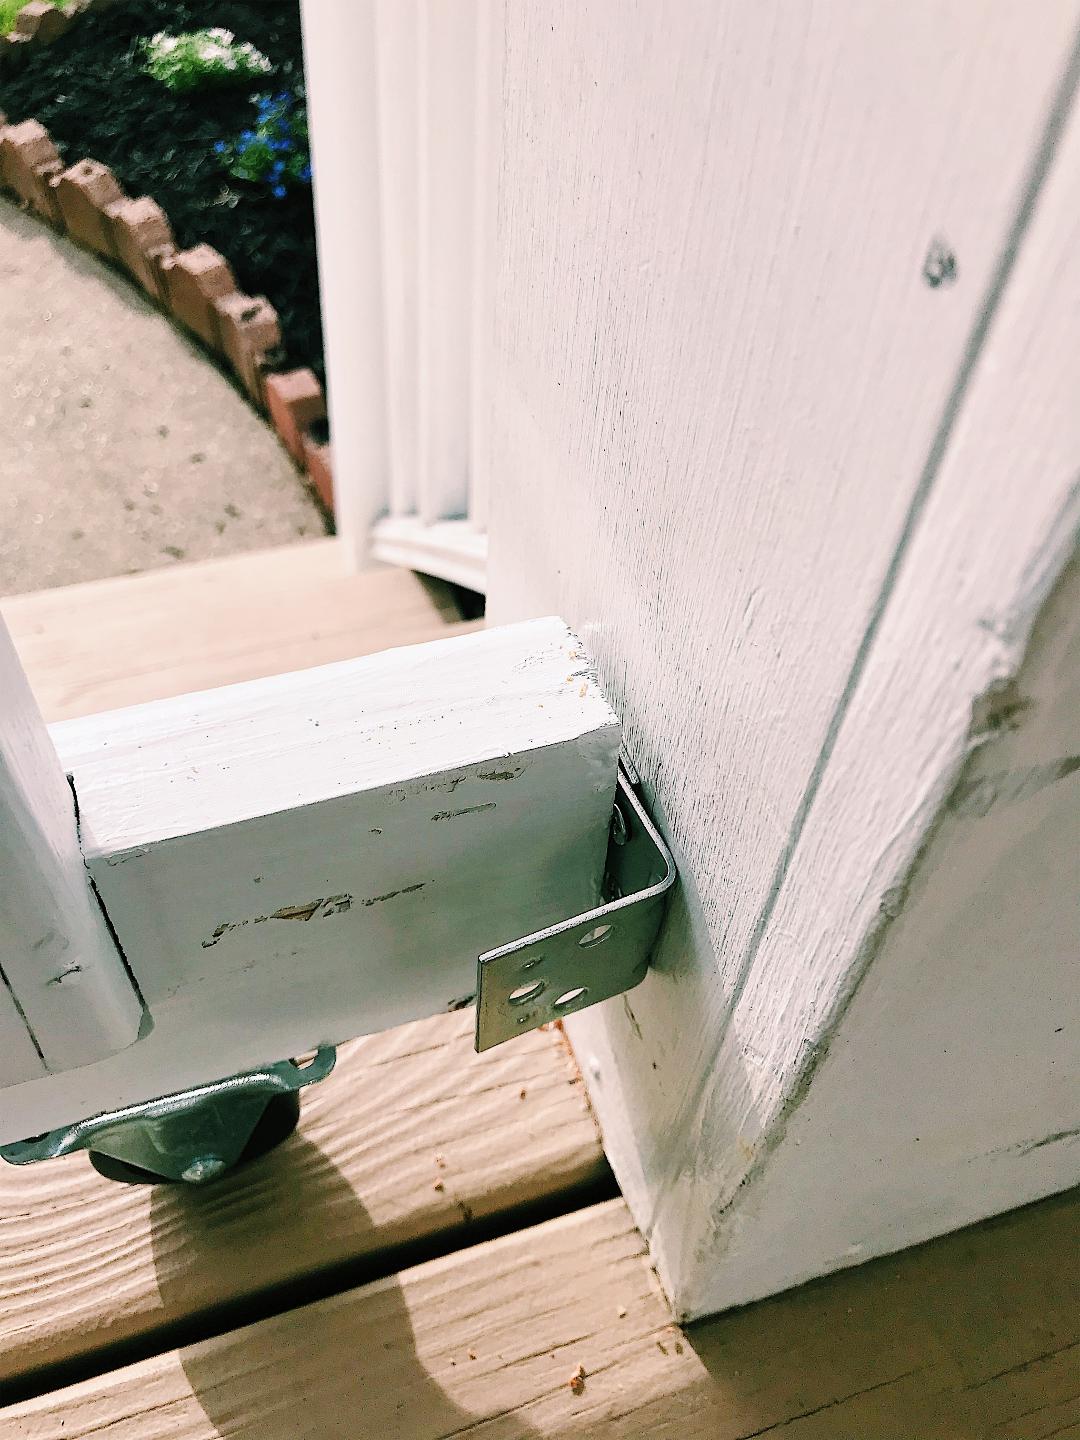
Then I used a hook and eye on both sides of the gate to make it fit in the space snug. I always worry that with baby gates if it’s not done secure enough on stairs that he could push forward and have it fall, whether that’s logical or not, so I wanted something bolted into the wall.

The last thing I did to keep the gate in place was this little L bracket set up. This is where you can tell it’s a DIY but it honestly doesn’t bother me. Basically the way it works is you slide it in on the wheels, hook the hook and eye’s in place, which is pretty tight and secure on it’s own, and then having these L brackets set up makes it where he can’t push on the bottom half of the gate and have it slide out.
With Parker not walking just yet, this gave us so much more useable outdoor space, where I can just let him crawl and play and he’s still covered from the sun! I’m in the market for an outdoor couch, so if anyone has one they love or that’s a good deal, send ideas my way! I’m so excited to spend sunny days on our porch, whether it’s rocking in the swing, working out, or just watching him play!