I ended up painting the doors a few weeks ago, and when I saw what a difference it made to my 20 year faded exterior it had me itching to update my shutters. I wasn’t planning on doing them until spring, but we all know how patient I am!
Except for my staining fiasco, this was a super straightforward project. Even then, it only took me two weeks to finish and that was just weather related. It randomly decided to snow here in November, which normally doesn’t happen here until January.

Anyway, I digress. I don’t have awesome before photos for you, but you can see here how much more the door pops after it was painted. It was the same color as the shutters. Which made me up my time line a bit :)

So off all the shutters came! I wanted to use them as templates for the new ones I was creating since each window was a different size! The only suggestion I would have to be labeling which shutter came from which window! I ended up getting a little confused!

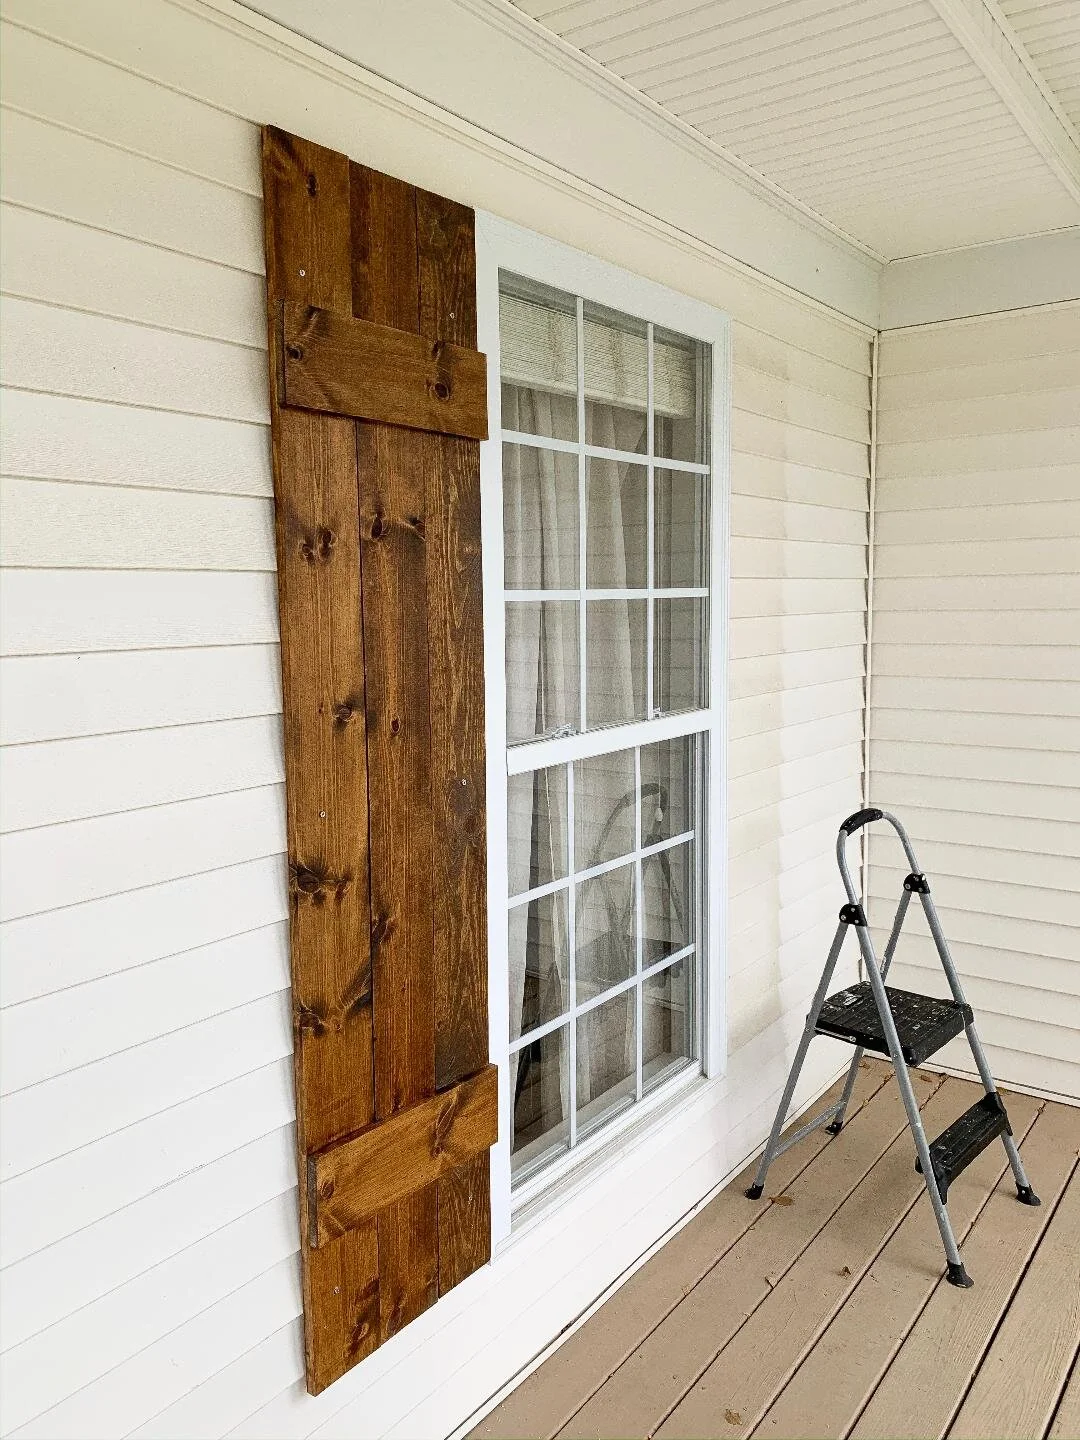
I measured my boards and just decided to do three vertical boards, and two horizontal boards. There are all sorts of patterns online you can look at, but this was my favorite. I got 6 inch boards too, so they’re very sturdy looking.

I lined everything up, spaced it equally, and then went to town with my nail gun. Seriously, how did I do projects before owning that thing? Literally my favorite and SOO much quicker.

I think buying the supplies, cutting them, and building the shutters took me maybe two days. really was exceptionally simple.


Then came the fun part. I just could not get the color of stain I wanted. The few wooden shutters I had seen in this area had an orange tint to them that I wanted desperately to avoid. I tried using decking stain at fist, and luckily did this on test boards. It took 4 colors of stain before I ended up finding one I liked. Even then I had mixed two together.
I opted to use regular stain and then a clear deck sealant. Temperature was key to getting this to dry (read: it wouldn’t), but I was eventually able to rub it in and add a top coat. Serious test to my patience but the color is perfect and now they’re sealed. We pray.

If all of them were on the ground, I wouldn’t have needed help at all. Alas, only one of the four windows didn’t require me to be on the roof or a ladder, so luckily my dad and husband like me enough to help. Don’t read that wrong, I was still the one hanging them, but someone to hold the ladder and hand me things is kind of important. LOL

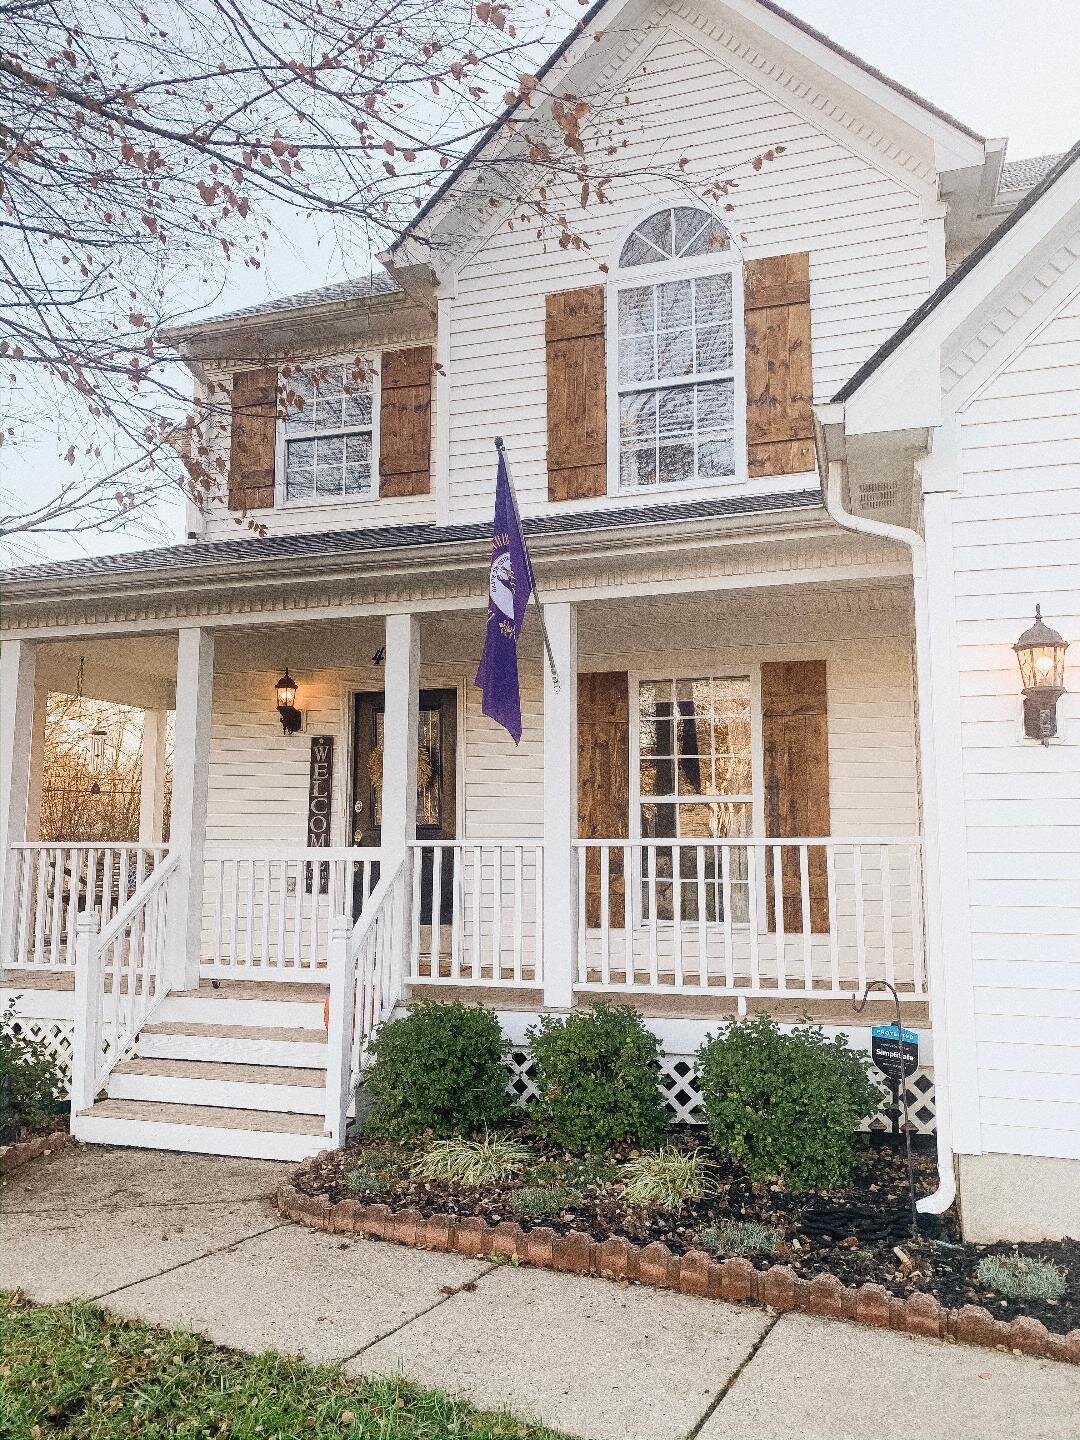
My photography skills are lacking, as is my phone’s ability to take photos, but YOU ALL. It’s like a brand new house. I can’t get over how good it looks. It turned it from a cookie cutter, faded older home, into more of a southern plantation home #goals
This is SOOO much more of what I had in my head when we bought this house. The next two updates that I want to add are creating a giant window box for below the window above the garage, and to frame in the garage door with some sort of trellis. But that probably needs to wait until spring. At least the trellis….